Graph
Overview
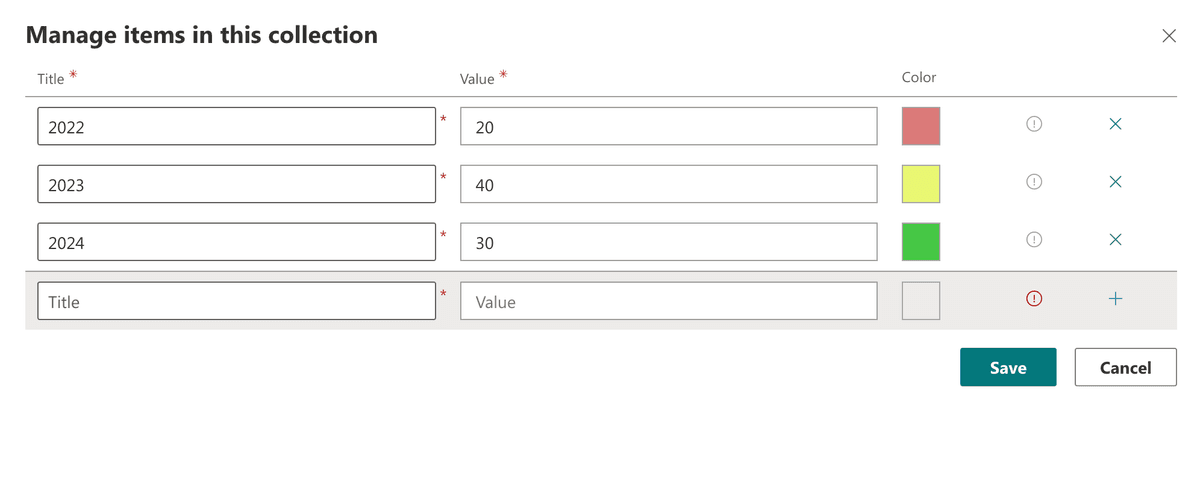
The Graph web part allows you to display charts in various configurations. You can choose between Bar Graph, Pie Chart, Doughnut, or Polar Area. You can also set a general web part title that is displayed at the top. Using the "Manage Items" button, you can configure your data with title, value, and color. This web part has no further theming options.

Features
- Multiple Chart Types: Choose between Bar Graph, Pie Chart, Doughnut, or Polar Area.
- Web Part Title: Set a general title for the web part displayed at the top.
- Data Management: Configure your data with titles, values, and colors using the "Manage Items" button.
Configuration
Adding the Web Part to a Page
- Navigate to the page where you want to add the Graph web part.
- Click on "Edit" mode.
- Click on the "+" Symbol to open the webpart dialog
- Select "Graph" from the list.
- Configure the web part settings as needed.
- Save and publish the page.
Configure the Web Part
- Select Chart Type: Choose between Bar Graph, Pie Chart, Doughnut, or Polar Area.
- Set Web Part Title: Enter a title for the web part that will be displayed at the top.
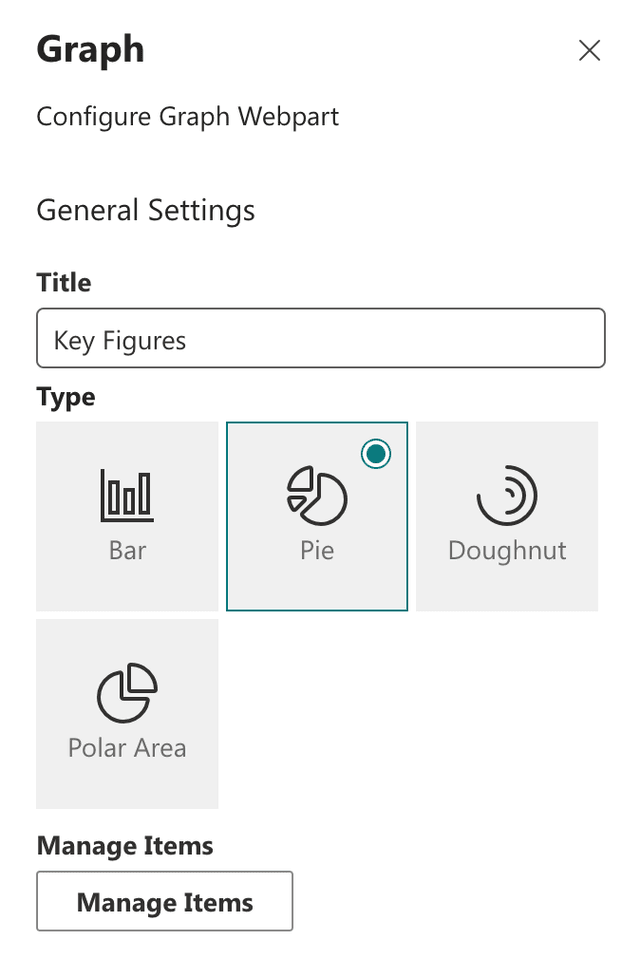
- Manage Items: Click the "Manage Items" button to configure your data.
- Title: Enter the title for each data item.
- Value: Enter the value for each data item.
- Color: Select a color for each data item.
Practical Use Cases
- Use Case 1: Use the Graph web part to display sales data in a bar graph, allowing users to quickly visualize performance metrics.
- Use Case 2: Implement a pie chart to represent the distribution of project tasks among team members, making it easy to see workload distribution at a glance.
FAQ
Question 1
Q: What types of charts can the Graph web part display?
A: The Graph web part can display Bar Graphs, Pie Charts, Doughnut Charts, and Polar Area Charts.
Question 2
Q: How do I customize the data in the Graph web part?
A: Click the "Manage Items" button to add or edit data items. You can set the title, value, and color for each data item.